Oh my goodness! I almost forgot--my refinished black dresser was featured on Roadkill Rescue, a website I absolutely love and have been using for inspiration for quite some time. You can find the feature here. We've gotten so many visitors to the Overbrook from that mention alone and I'm so grateful!
I also discovered that FROG TAPE tweeted a link to the chevron wall how-to, and also pinned the link to their Chevron Pinterest board! ...which is kind of funny, because I explicitly said in the post that I didn't use Frog Tape, but wished I had. Anyway, look them up, because they are the absolute best tape to use when you're painting and spraypainting projects.
Thank you to everyone who has stopped in to see what we're up to! We're thrilled to have your support, and we welcome your comments!
Sunday, December 30, 2012
$6.75 Caned Chair Makeover!
A while back I told you about a caned chair I had picked up at a garage sale for $6 (talked the nice lady down from $15) which my sister was reupholstering with some 75 cent fabric from another garage sale. I like the lines of old caned chairs like this. I think they're classic, but offer a touch of the exotic. Anyway, here was the chair as I found it, minus the stained seat cushion:

I sanded down the chipped spots and grimy bits, and then used wood filler and stain to make the chair look almost as good as new! Now, the chair has its own special corner in my bedroom.

There's still a little damage to the caning, but much better than what you might expect for a chair that's probably 50 years old! Didn't my sister do an amazing job with the reupholstering? And isn't that fabric surprisingly awesome for being so old? Apparently I used the 'wrong' side of it, but I like it this way :) I even took an up-close picture of the fabric so you could appreciate it:

So what do you think? Have you found any amazing fabric remnants that you just had to incorporate into your interior? And what's your opinion on caned chairs--frumpy or fabulous?

I sanded down the chipped spots and grimy bits, and then used wood filler and stain to make the chair look almost as good as new! Now, the chair has its own special corner in my bedroom.

There's still a little damage to the caning, but much better than what you might expect for a chair that's probably 50 years old! Didn't my sister do an amazing job with the reupholstering? And isn't that fabric surprisingly awesome for being so old? Apparently I used the 'wrong' side of it, but I like it this way :) I even took an up-close picture of the fabric so you could appreciate it:

Saturday, December 29, 2012
Broken Charcoal Chair Makeover
I'm out of control, you guys. I went almost two years without painting after completing my degree in art, but now that I've started, I don't know if I can stop. Canvases, chairs, end tables, dressers (as you saw in the last post), you name it. And it's not just paint projects either. I've been making yarn wreaths and things like that. YARN WREATHS, PEOPLE.
[No offense to people who make yarn wreaths. I'm now one of you.]
ANYWAY. I scooped this basic wooden chair up from the end of someone's driveway last week. So what if it was missing the top piece across the back? Who needs that bit anyway? The seat was intact, the legs were sturdy, and the chair had such nice, clean lines. I loaded it up into the Party Van and brought it home.
[Yes, I drive a mini-van, and I have no complaints about it precisely because it is so convenient for picking up furniture and moving things to and from my apartment.]

So. Sanded the heck out of the chair, until I finally decided not to worry about the discoloration on the seat (it appeared to be oil or something like that, not anything gross), and then I primed it. I then left it on a drop cloth in my kitchen and painted on a couple coats of Benjamin Moore's Charcoal, with a coat of a random teal color I already had, over the course of several days. Worst roommate ever.
Once I was satisfied with the amount of paint I'd applied, I begin distressing the piece. I've had my doubts about distressing in the past, because I think a lot of people simply use it as a way to disguise a poor paint job. On the other hand, a chair is going to get pretty scuffed up around the legs and seat, so I also see distressing as a way to delay those inevitable touch-ups.
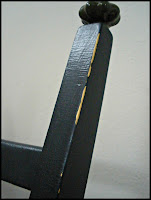
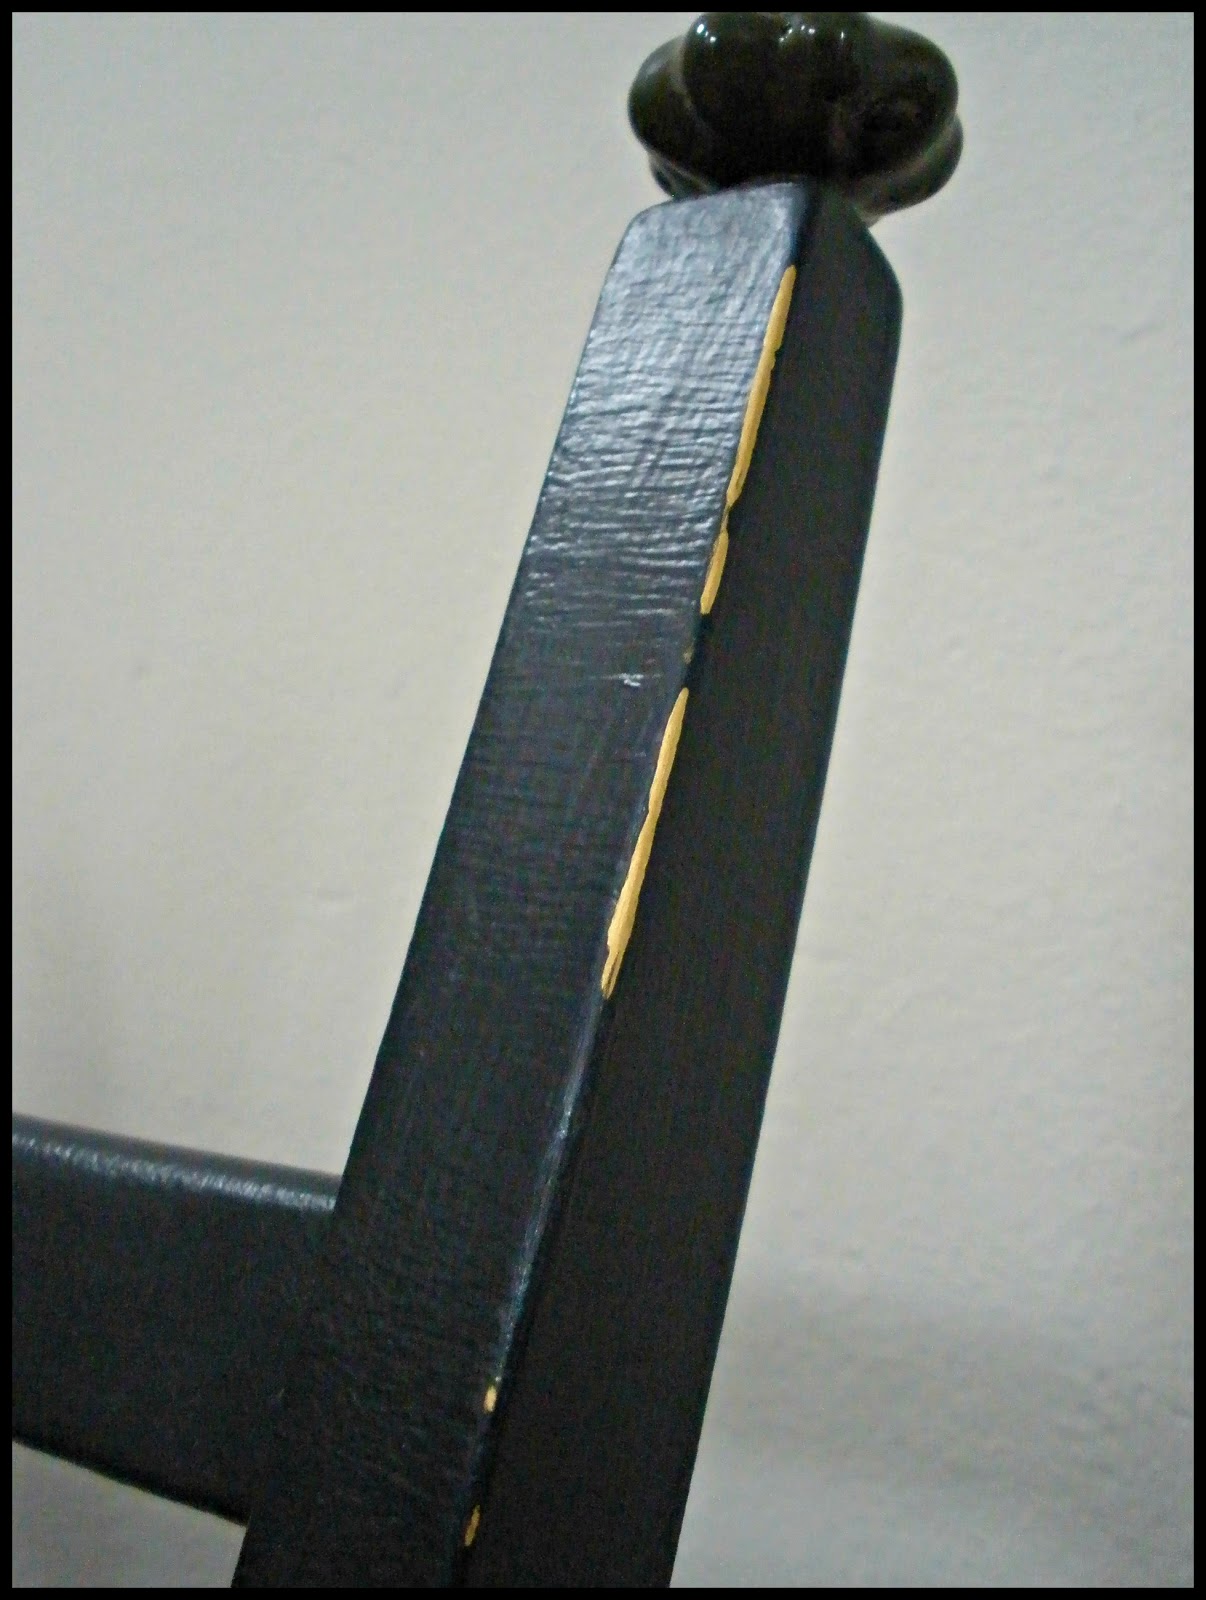
Because the teal wasn't popping as much as I wanted it too, I used a paint pen to make it look as though the chair had a layer of gold paint hidden somewhere under the black. Then I used a couple of Hobby Lobby knobs (seriously, obsessed!) to dress up the back where the missing top slat used to go across. [I didn't explain that very well, so just check out the pictures!]
I don't mind the visible brushstrokes on this project because I wanted the chair to have lots of texture. This was also my first time experimenting with wax paste as a top coat, and I kinda liked it.
The final result:

That pillow on the floor is covering up some random junk I tried to hide behind the side of the couch. And that's the chair! I have absolutely no idea what to do with it now. I think I need a home office space with a little desk and everything, and incorporate that chair into it. Also, is it just me, or did the Benjamin Moore Charcoal end up looking like a slate grey, with blue undertones?
Wanna know what's next?? A QUEEN HEADBOARD AND FOOTBOARD THAT I PICKED UP FROM BESIDE THE DUMPSTER IN MY APARTMENT COMPLEX. When I say I'm out of control, I'm not kidding. I don't even have a queen-sized bed. The whole thing is wooden and very solid, so obviously I want to paint it to make it a little more fun and versatile. Please hurry with suggestions, because it is currently in the back of the Party Van, taking up valuable space I could have used to pick up two Craigslist dressers in the past couple of days.
Also, the local K-Mart is going out of business, and they've got an aisle full of Rustoleum spraypaint and primers for 40% off. I've already picked up cans of Rustoleum primer and Zinsser primer, plus some brushes, but are there any colors or enamels you'd recommend? I've got my eye on their semi-ugly chartreuse shade, but since I don't have a particular project in mind for it, I'm waiting til the price goes down a little more.
Have a beautiful day!
[No offense to people who make yarn wreaths. I'm now one of you.]
ANYWAY. I scooped this basic wooden chair up from the end of someone's driveway last week. So what if it was missing the top piece across the back? Who needs that bit anyway? The seat was intact, the legs were sturdy, and the chair had such nice, clean lines. I loaded it up into the Party Van and brought it home.
[Yes, I drive a mini-van, and I have no complaints about it precisely because it is so convenient for picking up furniture and moving things to and from my apartment.]

So. Sanded the heck out of the chair, until I finally decided not to worry about the discoloration on the seat (it appeared to be oil or something like that, not anything gross), and then I primed it. I then left it on a drop cloth in my kitchen and painted on a couple coats of Benjamin Moore's Charcoal, with a coat of a random teal color I already had, over the course of several days. Worst roommate ever.
Once I was satisfied with the amount of paint I'd applied, I begin distressing the piece. I've had my doubts about distressing in the past, because I think a lot of people simply use it as a way to disguise a poor paint job. On the other hand, a chair is going to get pretty scuffed up around the legs and seat, so I also see distressing as a way to delay those inevitable touch-ups.
Because the teal wasn't popping as much as I wanted it too, I used a paint pen to make it look as though the chair had a layer of gold paint hidden somewhere under the black. Then I used a couple of Hobby Lobby knobs (seriously, obsessed!) to dress up the back where the missing top slat used to go across. [I didn't explain that very well, so just check out the pictures!]
I don't mind the visible brushstrokes on this project because I wanted the chair to have lots of texture. This was also my first time experimenting with wax paste as a top coat, and I kinda liked it.
The final result:

That pillow on the floor is covering up some random junk I tried to hide behind the side of the couch. And that's the chair! I have absolutely no idea what to do with it now. I think I need a home office space with a little desk and everything, and incorporate that chair into it. Also, is it just me, or did the Benjamin Moore Charcoal end up looking like a slate grey, with blue undertones?
Wanna know what's next?? A QUEEN HEADBOARD AND FOOTBOARD THAT I PICKED UP FROM BESIDE THE DUMPSTER IN MY APARTMENT COMPLEX. When I say I'm out of control, I'm not kidding. I don't even have a queen-sized bed. The whole thing is wooden and very solid, so obviously I want to paint it to make it a little more fun and versatile. Please hurry with suggestions, because it is currently in the back of the Party Van, taking up valuable space I could have used to pick up two Craigslist dressers in the past couple of days.
Also, the local K-Mart is going out of business, and they've got an aisle full of Rustoleum spraypaint and primers for 40% off. I've already picked up cans of Rustoleum primer and Zinsser primer, plus some brushes, but are there any colors or enamels you'd recommend? I've got my eye on their semi-ugly chartreuse shade, but since I don't have a particular project in mind for it, I'm waiting til the price goes down a little more.
Have a beautiful day!
Thursday, December 20, 2012
The Glossy Black Dresser
So. My free, beat-up blue dresser that I picked up curbside after seeing a craigslist ad. I had big plans for it, as you saw from what I posted a couple of weeks ago. As this was my first big furniture-painting project, I kind of had to roll with the punches and learn as I worked. Let's just get to the photos, shall we?
Here's the dresser as I found her (well, I removed the drawers):

As you can see, the slats between the drawers were broken, because the dowel rods that had fit between them and the sides of the dresser were gone. That bottom slat even looks homemade. What you can't see is that the top was loose, the paint was chipped, and the legs were scuffed up pretty bad.
So I had my little sister get out the vice and the hand saw, and she made me some little pieces to fit the slats back into their places out of old paint brushes! She's the best.

Then we used wood glue to hold secure them, and put wood filler over the holes to make it pretty. After screwing the top of the dresser back into place, it was time to prime and paint, paint, paint. I was going for something sexy and black and glossy, so I sprayed the whole thing with a shiny clear enamel when I was done.
I didn't want to use the boring wooden knobs that were originally on the dresser, so I went to Hobby Lobby. I couldn't believe how cheap their hardware was! And their selection was really great. In the end, I picked out these amazing crystal owl knobs for the top drawer, and simpler green knobs for the other three drawers.


She's sturdy and saucy. Because this was my first big paint project, there are a few drips and a little unevenness, but I'm thrilled with the overall result, as is my man. As you can see, it's not in his room yet, but sitting in my living room. The painting on top is one of mine from high school, the reed placemat and hurricane vase were on clearance at Home Goods, the green candles were on clearance at Target (because it is NOT too late for my apartment to be smelling like pine needles!) and the purple candle was 50 cents at an estate sale. That little tray was a Salvation Army find. Oh yeah, and the flowers? My boyfriend got them for me. FOR NO REASON. He's the best.
I'm so excited and couldn't wait for my next project! I've still got to finish the sewing machine table, and there's a half-painted chair sitting in my kitchen! What projects are you working on right now? And does anyone else have any secret sources for hardware, knobs, and pulls?
[Here's the original 'after' picture. The new one's much better, don't you think?]

Here's the dresser as I found her (well, I removed the drawers):

So I had my little sister get out the vice and the hand saw, and she made me some little pieces to fit the slats back into their places out of old paint brushes! She's the best.

Then we used wood glue to hold secure them, and put wood filler over the holes to make it pretty. After screwing the top of the dresser back into place, it was time to prime and paint, paint, paint. I was going for something sexy and black and glossy, so I sprayed the whole thing with a shiny clear enamel when I was done.
I didn't want to use the boring wooden knobs that were originally on the dresser, so I went to Hobby Lobby. I couldn't believe how cheap their hardware was! And their selection was really great. In the end, I picked out these amazing crystal owl knobs for the top drawer, and simpler green knobs for the other three drawers.

After being moved, assembled, and staged, here's what the dresser looks like now:

I'm so excited and couldn't wait for my next project! I've still got to finish the sewing machine table, and there's a half-painted chair sitting in my kitchen! What projects are you working on right now? And does anyone else have any secret sources for hardware, knobs, and pulls?
[Here's the original 'after' picture. The new one's much better, don't you think?]

Tuesday, December 18, 2012
Sneak Peak of the Living Room in Apartment 69!
Yep, my roommate and I are working with 1100 square feet of white-walled blandness. Our greatest challenge, obviously, has been decorating it for cheap (and finding the time to do said decorating). Fortunately, garage sales have been our best friend. We've found prints, frames aplenty, colorful dish towels, four-foot-tall faux-gilt mirrors, and old furniture desperately in need of a makeover. Our kitchen, of course, is now the home to the fun rolling bar you saw a couple of posts back.
I can't show you our rooms yet, because they're far too messy.
But the living room, while still unfinished, has a nice vibe. After making a few quick measurements, I used some old interior paint that we found for 25 cents a can at one of our first garage sales and painter's tape to create a fun chevron wall, like we've all been seeing all over Pinterest (can you tell I'm obsessed with chevrons?!):

You won't find a full tutorial here, because I lacked the presence of mind to document the process. But all I did was measure the wall lengthwise and widthwise and then divide those numbers by nice, even numbers (for instance, if the wall was 90 inches tall, I would have divided it into nine- or ten-inch sections, and done something similar across the wall). As you can see, I only divided the width into five sections, because I wanted the pattern to be both broad and symmetrical. These measurements left me with a series of dots on the wall, between which I applied my painter's tape. If I taped from left to right, I started at the bottom left corner, then went up to the next dot over, then back down to the original level, then back up again, and so on.

I want to stress that this is nowhere near as complicated as I'm making it sound, nor is it as difficult as it looks. You just measure, do some simple math, mark out some lines WITH PENCIL, use FROG TAPE (not the cheap painter's tape like I did because you will get bleeds) to make the chevron pattern, and then paint away! I put on a couple of coats, and I was probably done in a few hours (not too sure because I started this in the middle of the night and then finished it the next morning). For the size of wall I used, which was less than a hundred inches each way, I could easily have used a sample size of each color (I know this because the grey I used was in a sample jar, and I didn't use all of it). You may need a paint pen to clean up some edges--I did.
So that's the accent wall in our living room! The couch we purchased from one of my coworkers, and the teal pillows I found on clearance at Target a couple of summers ago (they're an indoor-outdoor fabric, so they're super versatile and easy to keep clean). The lamp was also on a Target clearance shelf for less than $14, down from an original price of about $45!!!
What trends are you seeing and incorporating into your living space?
{linking to Tater Tots & Jello!}
I can't show you our rooms yet, because they're far too messy.
But the living room, while still unfinished, has a nice vibe. After making a few quick measurements, I used some old interior paint that we found for 25 cents a can at one of our first garage sales and painter's tape to create a fun chevron wall, like we've all been seeing all over Pinterest (can you tell I'm obsessed with chevrons?!):
You won't find a full tutorial here, because I lacked the presence of mind to document the process. But all I did was measure the wall lengthwise and widthwise and then divide those numbers by nice, even numbers (for instance, if the wall was 90 inches tall, I would have divided it into nine- or ten-inch sections, and done something similar across the wall). As you can see, I only divided the width into five sections, because I wanted the pattern to be both broad and symmetrical. These measurements left me with a series of dots on the wall, between which I applied my painter's tape. If I taped from left to right, I started at the bottom left corner, then went up to the next dot over, then back down to the original level, then back up again, and so on.

I want to stress that this is nowhere near as complicated as I'm making it sound, nor is it as difficult as it looks. You just measure, do some simple math, mark out some lines WITH PENCIL, use FROG TAPE (not the cheap painter's tape like I did because you will get bleeds) to make the chevron pattern, and then paint away! I put on a couple of coats, and I was probably done in a few hours (not too sure because I started this in the middle of the night and then finished it the next morning). For the size of wall I used, which was less than a hundred inches each way, I could easily have used a sample size of each color (I know this because the grey I used was in a sample jar, and I didn't use all of it). You may need a paint pen to clean up some edges--I did.
So that's the accent wall in our living room! The couch we purchased from one of my coworkers, and the teal pillows I found on clearance at Target a couple of summers ago (they're an indoor-outdoor fabric, so they're super versatile and easy to keep clean). The lamp was also on a Target clearance shelf for less than $14, down from an original price of about $45!!!
What trends are you seeing and incorporating into your living space?
{linking to Tater Tots & Jello!}
Tuesday, November 27, 2012
My Newest Project
For the first time, I picked up a piece of furniture I found on craigslist. It's a blue dresser, one of those pre-fab ones that you can probably get at Target or IKEA, and it's kinda beat up, but I'm gonna sand it, prime it, and paint it black. And the insides of the drawers shall be varying shades of grey and it shall be glorious. It's perfect because my boyfriend needs a dresser for his new place and this will be an early Christmas present for him!
In other news, Katsy thinks I have a problem, due to the number of old furniture items coming into our garage being higher than the number of items leaving it. I'm just trying to stockpile projects to work on during the coming winter.
What about you? Have you had any success with finding DIY projects on craigslist?
Monday, November 12, 2012
What's Next: Singer Sewing Machine Table for the Entry Hall
Found last weekend: A beautiful old sewing machine table, for $10. Unfortunately, it's spent quite a bit of time outside, so the veneer is chipping a little, and it's covered in dust and spider eggs. I've already spray painted the base with black Rustoleum, and I'm stripping the veneer off the top. Next, I plan on gluing the veneer on the sides back into place, then sanding the sides, priming them, and painting them (because I don't want to strip off the gorgeous details), while staining the top. One drawer pull is missing, so I'm still deciding whether or not to change them all out, or try to find a replacement. Basically, here's what I'm working with:

I can't wait to buckle down this week and try to get it finished!

I can't wait to buckle down this week and try to get it finished!
Keep Calm and Indulge
A couple of weeks ago, I was on my way home after a long day of garage and estate sales, when I saw one last sign just blocks from my apartment. I decided to stop by, even though I was down to my last dollar.
There were a lot of kids clothes, and some old electronics. . . and a baby changing table. Boy, it was in rough shape. One of the drawers was missing its pull, and the same drawer needed to be glued back together, and a kid had scribbled all over the side with pen, and something strange had dripped over it and dried. It seemed like exactly the sort of item its owner might want to make a deal for. . .
Of course, that's what I spent my last dollar on. I felt a little silly, but I had big plans for that beat-up changing table. Over the next week and a half, I added casters to the legs, used disinfecting wipes and a Magic Eraser to get rid of the pen marks and strange gunk, and gave it some saucy acrylic crystal drawer pulls.

But I wasn't sure what to do with the top of it. My dream was to turn it into a kitchen island/drink station/mini-bar, so I wanted to waterproof it. I thought about using those little tiles and grout and actually mosaic-ing it, but I didn't know if that would warp the cheap wood. I really wanted to decoupage an antique-looking world map onto the top, but I couldn't find one anywhere. To explore my options, I spent a few hours in Michael's, where I found a deal on craft paper (6 12x12 pieces for $1), and was able to hunt down the pour-on bar top resin that I'd seen online.
Ultimately, I ended up writing a trendy little slogan on top ("Keep Calm and Indulge"), and then surrounded the letters with home improvement store paint swatches in a mosaic pattern. If I had it to do over again, I would just do the mosaic with no words. Here's how it turned out:

Although Kat and I are trying to make this whole furniture repurposing thing profitable, this is another piece that will be staying in my apartment kitchen. And I don't feel bad about that at all.
Monday, October 22, 2012
What we're working on {October}
Since moving into the city, my roommate and I have been obsessed with garage sales. This was just part of our haul a few weeks ago:


Total cost for all this swag: about $25. Now, Katsy and I are working on redoing the $5 dresser so I can use it as a nightstand. The paint (.25 per can) will be going on our living room wall, the $1 toaster is already in the kitchen, the pterodactyl costume is just waiting for its moment of glory, and we need to frame the Marilyn print and put it up in the bathroom.
And then we've got this sneaky little coffee table. I love the lines and the shape, but I hated the original finish.

But this is what I'm most excited about. It's a gorgeous old caned chair that I picked up from a garage sale for $6!!! It had some chips and dents, and plenty of wear on the arms, but the caning was in really good shape and the chair was just too gorgeous to pass up. I then found some 75 cent fabric at a separate sale, and Kat used it to reupholster the seat cushion (not pictured) and the pillow.

I don't have a picture of the final product, but it looks pretty amazing after all the love we gave it! More pics coming soon!
Sunday, October 21, 2012
Welcome to the Overbrook!
Subscribe to:
Comments (Atom)